
HEADLAMP — Installation and Adjustment (Cont'd) / Headlamp Motor Check / Bulb Replacement
EL-45prose procedureInstallation and Adjustment (Cont'd)
Adjust Stopper
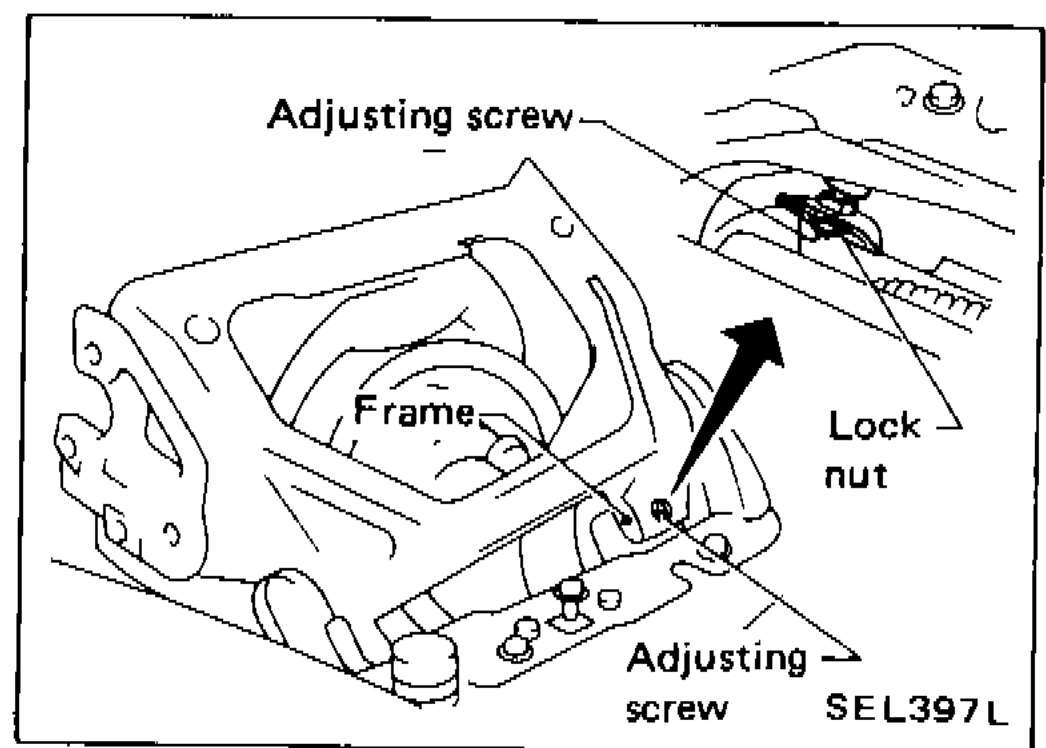
- 3Adjust stopper.
 SEL397L
 - 3-1Loosen lock nut on stopper.
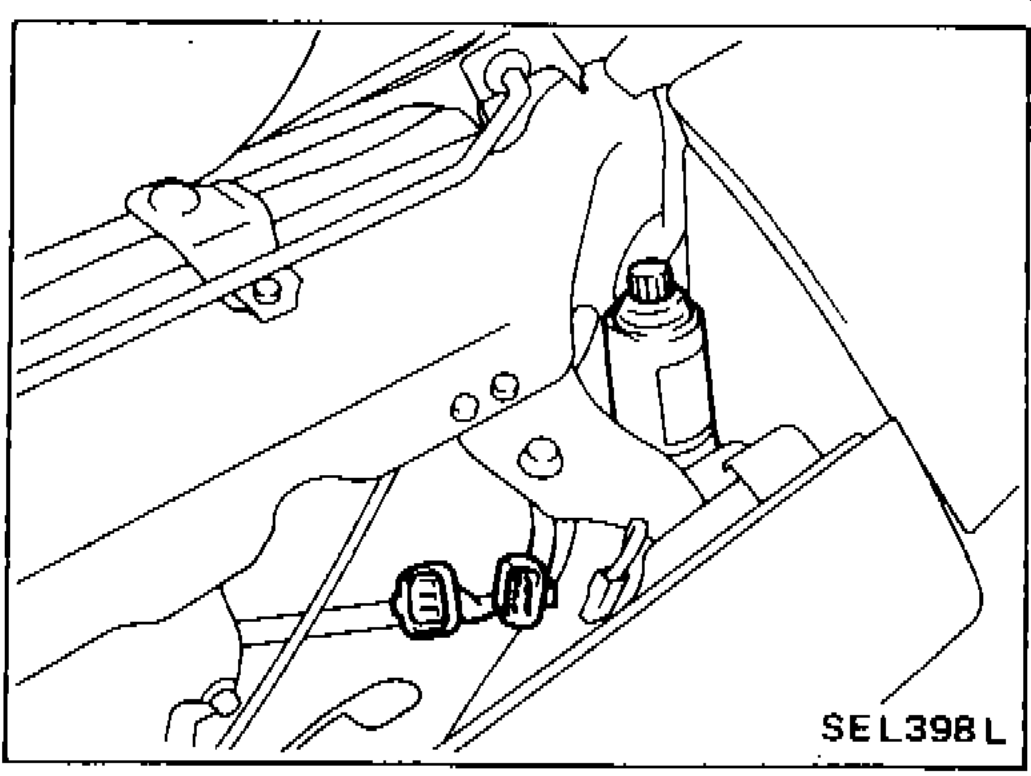
- 3-2Turn motor manual knob to open headlamp assembly completely.
 SEL398L
 - 3-3Adjust stopper screw.
Headlamp Motor Check
- 1Disconnect battery ground cable.
- 2Disconnect the headlamp motor connector.
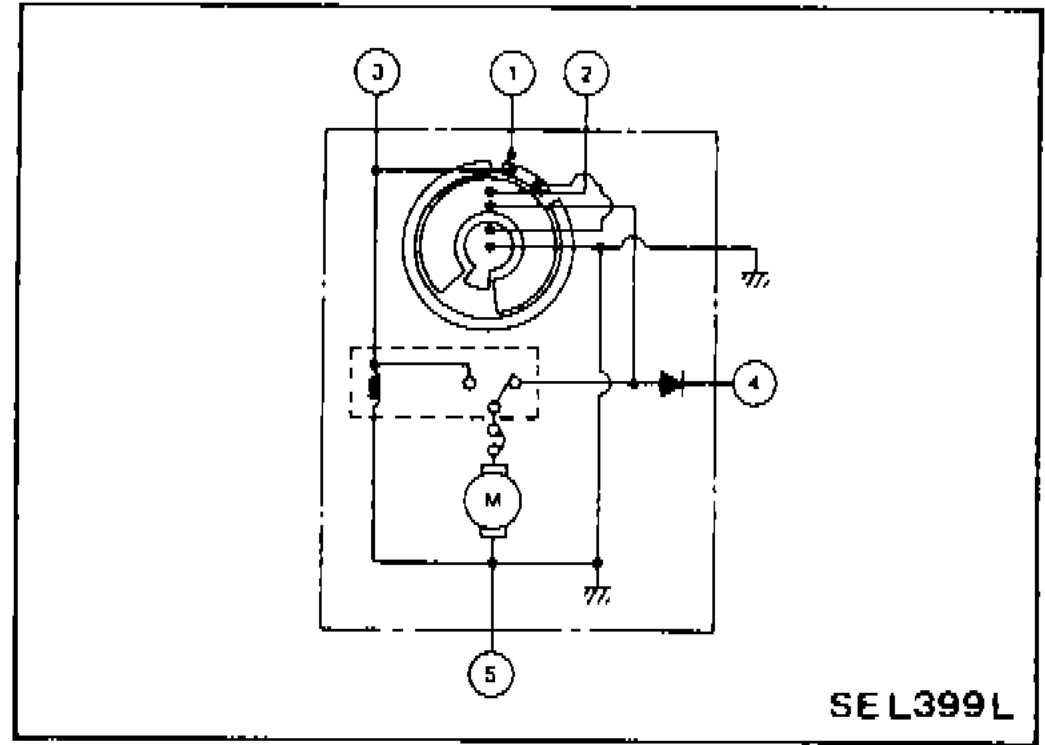
- 3Use an ohmmeter to check for continuity in headlamp motor circuit while rotating motor with manual knob.
 SEL399L
Headlamp Motor Continuity Check
"CLOSE"
Ohmmeter probe (+)1
Ohmmeter probe (-)5
ContinuityYES
"CLOSE"
Ohmmeter probe (+)2
Ohmmeter probe (-)5
ContinuityNO
"CLOSE"
Ohmmeter probe (+)1
Ohmmeter probe (-)3
ContinuityNO
"CLOSE"
Ohmmeter probe (+)3
Ohmmeter probe (-)1
ContinuityYES
"OPEN"
Ohmmeter probe (+)1
Ohmmeter probe (-)5
ContinuityNO
"OPEN"
Ohmmeter probe (+)2
Ohmmeter probe (-)5
ContinuityYES
"OPEN"
Ohmmeter probe (+)2
Ohmmeter probe (-)4
ContinuityNO
"OPEN"
Ohmmeter probe (+)4
Ohmmeter probe (-)2
ContinuityYES
Bulb Replacement
Installing Headlamp Rubber Cap
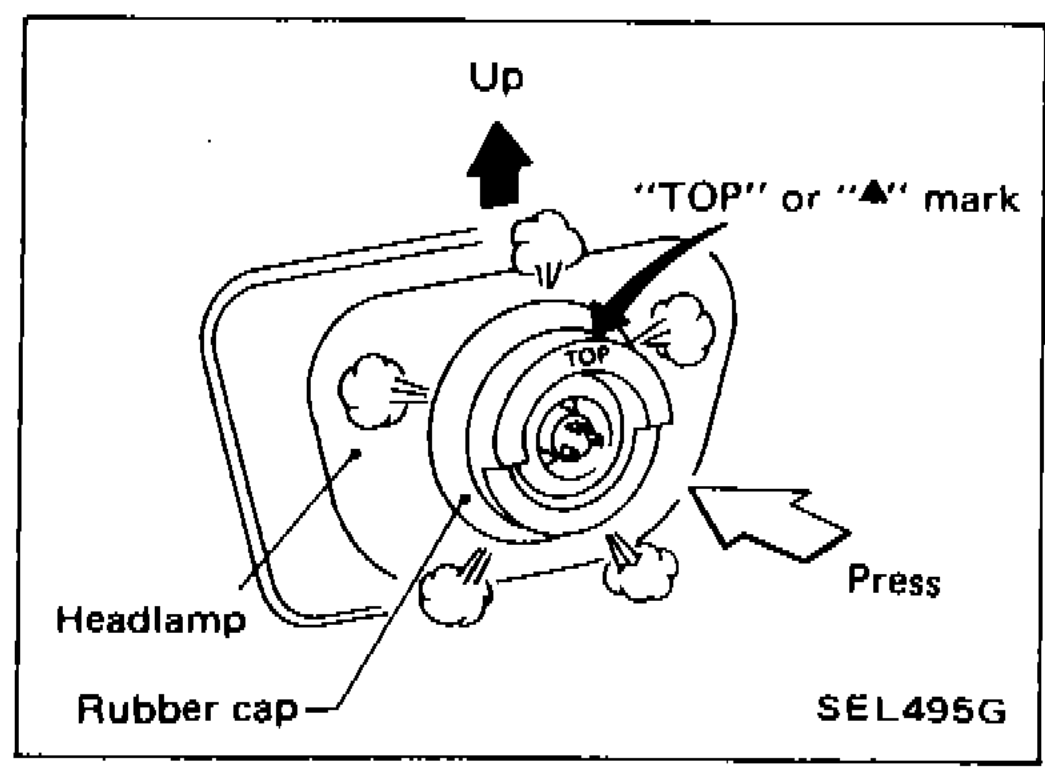
- 1When installing the rubber cap, set the "TOP" or "▲" mark so that it is facing up.
 SEL495G
 - 2Press the rubber cap firmly so that the lip makes contact with the headlamp body.
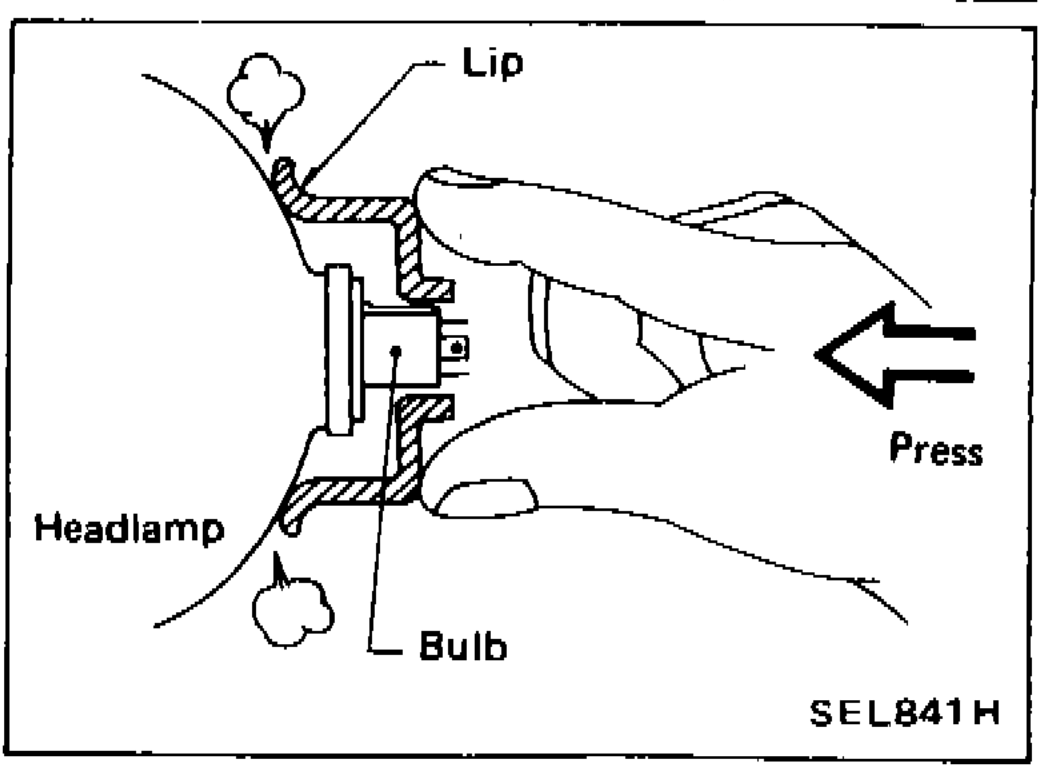 SEL841H