
REAR AXLE — Drive Shaft — Disassembly (Cont'd) and Inspection
RA-15prose procedureDisassembly (Cont'd)
Final-drive-side disassembly (continued from RA-14)
- 5Pry off snap ring, then remove spider assembly.Do not disassemble spider assembly.
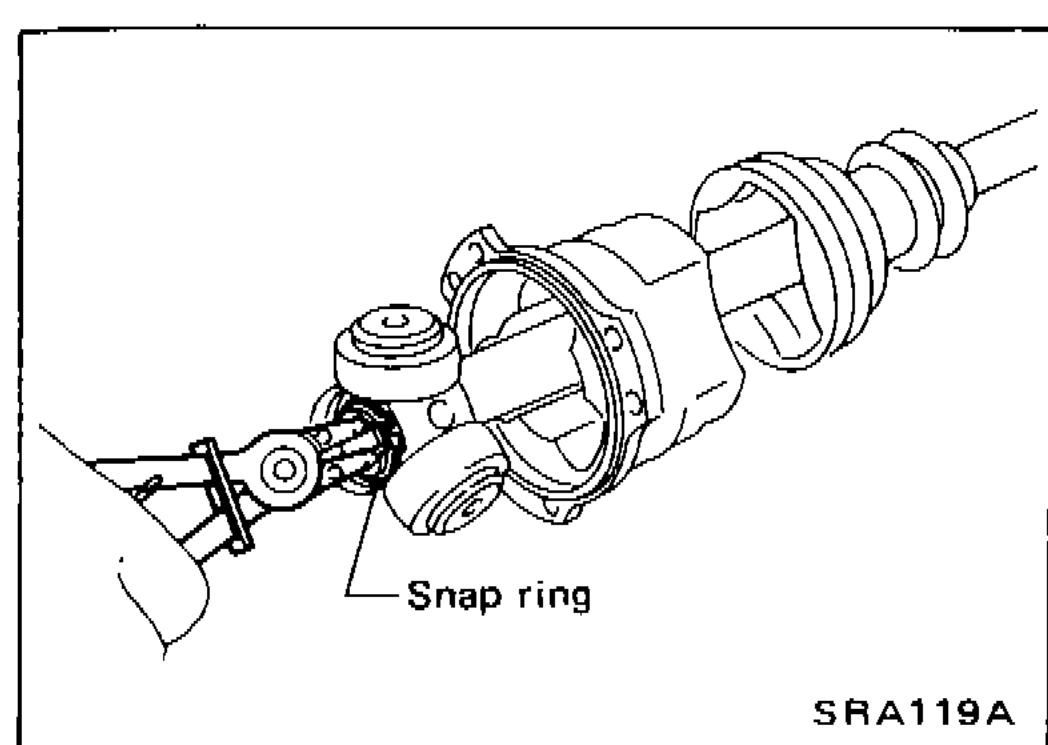 SRA119A
 - 6Draw out slide joint housing.
- 7Draw out boot.Cover drive shaft serration with tape to prevent damage to the boot.
WHEEL SIDE
Wheel-side disassembly
- 1Remove boot bands.
- 2Put matchmarks on housing together with shaft and drive shaft before separating joint assembly.
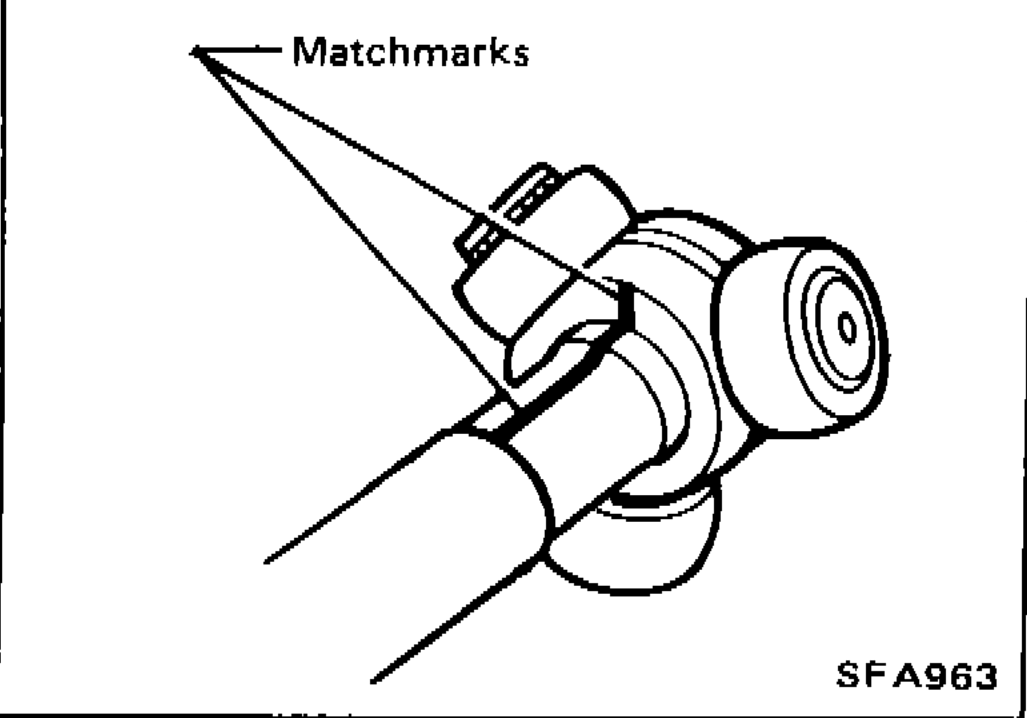 SFA963
 - 3Put matchmarks on spider assembly and drive shaft.
- 4Pry off snap ring "A" with a screwdriver, and pull out slide joint housing.
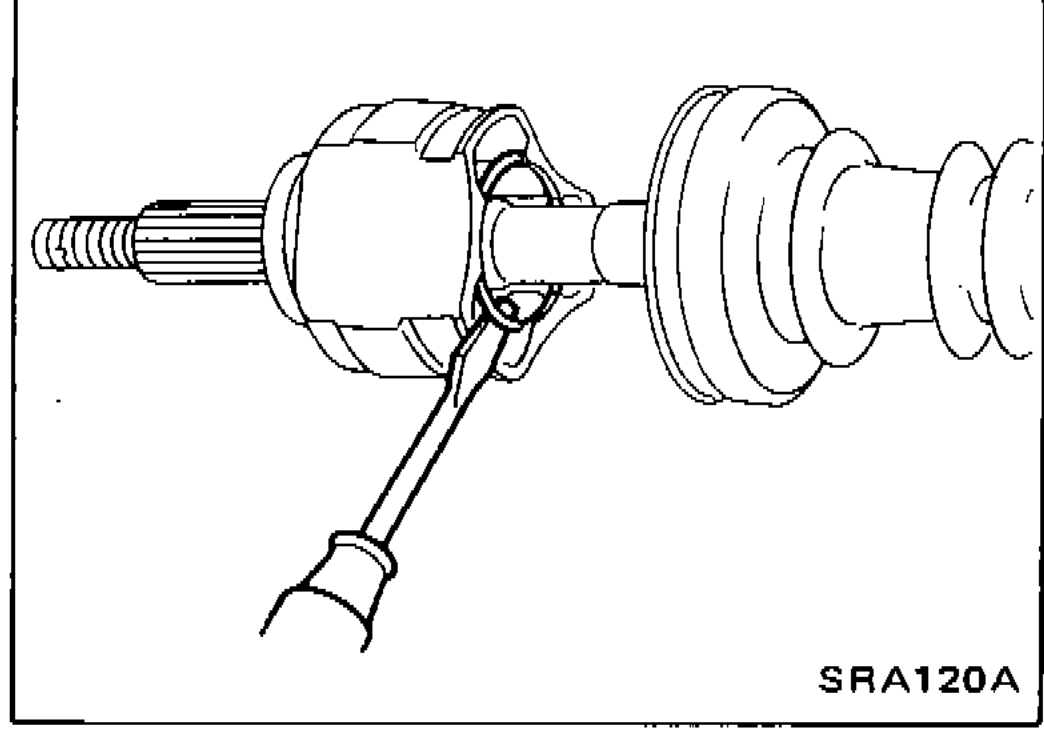 SRA120A
 - 5Pry off snap ring "B", then remove spider assembly.Do not disassemble spider assembly.
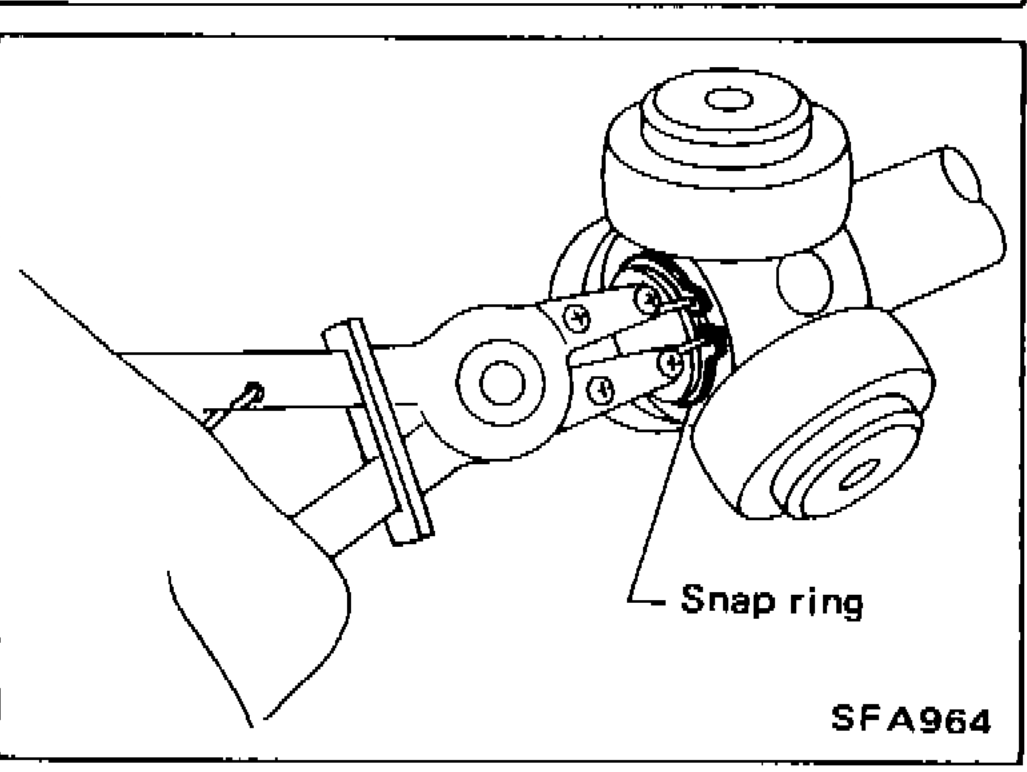 SFA964
 - 6Draw out boot.Cover drive shaft serration with tape to prevent damage to the boot.
Inspection
Thoroughly clean all parts in cleaning solvent, and dry with compressed air. Check parts for deformation or other damage.
DRIVE SHAFT
Replace drive shaft if it is twisted or cracked.
BOOT
Check boot for fatigue, cracks, or wear. Replace boot with new boot bands.